Everything You Need to Know to Use Your Mobile Phone Legally in Indonesia
If you’re planning to use your mobile phone in Indonesia—especially for more than 90 days—IMEI registration is not optional. Since the Indonesian government introduced the IMEI registration policy, it’s become mandatory for both locals and foreigners to ensure their mobile devices are legal and functioning on Indonesian networks.
In this complete guide, we’ll walk you through everything you need to know about IMEI registration in Indonesia, including who needs to register, how to do it, and how much it costs.
What is an IMEI Number?
IMEI stands for International Mobile Equipment Identity. It’s a unique 15-digit number assigned to every mobile device. Think of it as your phone’s digital fingerprint — it allows authorities and carriers to verify your device.
You can check your IMEI by dialing *#06# or finding it in your phone’s Settings > About Phone section.
Why is IMEI Registration Required in Indonesia?
IMEI registration is Indonesia’s way to:
- Combat the circulation of illegal or black-market phones
- Ensure that customs duties and taxes are paid
- Improve data security and consumer protection
If your device is not registered, you won’t be able to connect to any Indonesian mobile network.
Who Needs to Register Their IMEI?
| User Type | IMEI Registration Required? | Notes |
| Tourists (less than 90 days) | ❌ Not Required | You can use roaming or WiFi |
| Tourists (more than 90 days) | ✅ Required | Must register at Customs |
| KITAS/KITAP holders | ✅ Required | You can pay reduced taxes |
| Locals buying overseas devices | ✅ Required | Same process applies |
Bringing Your Phone to Indonesia? Here’s What to Do:
If you’re staying for more than 90 days, or you plan to use an Indonesian SIM card, you must register your IMEI. Here’s how:
Where to Register: Bali & Jakarta Airports
📍 Bali (Ngurah Rai Airport)
- Location: In front of the Customs X-Ray area (before exiting the airport)
- Hours: Business hours only — plan accordingly!
📍 Jakarta (Soekarno-Hatta Airport – Terminal 3)
- Location: 2nd floor, behind zone 1 counters (International Departures area)
- Tip: Allow 30–60 minutes for this process
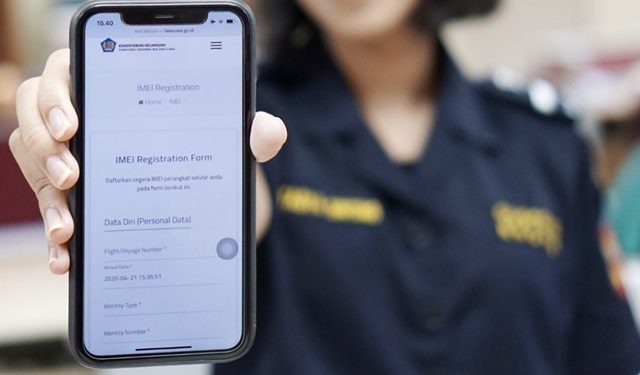
Step-by-Step Guide to IMEI Registration in Indonesia
1. Fill Out the Online Form
Go to the official Indonesian Customs IMEI registration page (Bea Cukai). You’ll need:
- Passport details
- Flight details
- Device information and price
- NPWP number (for KITAS/KITAP holders)
- Purchase invoice (if available)
🟢 Once submitted, you’ll receive a QR code and email confirmation.
2. Prepare Your Documents
You’ll need to present:
- Passport (original)
- Boarding pass
- Your phone (physical device)
- Invoice or proof of purchase
- QR code (printed or digital)
3. Visit the Customs Office at the Airport
Show the officer your documents and device. The process is quick (10–15 minutes) if no queue.
4. Pay Customs Duties (If Applicable)
The amount depends on your phone’s value:
| Phone Value | Customs Fee | Notes |
| Under USD 500 | Free | Up to 2 devices per person |
| Over USD 500 | 30–40% on value above $500 | 30% if you have KITAS & NPWP, otherwise 40% |
Example:
A phone worth $900 → $400 taxable → 40% = $160 customs fee
5. Wait for Activation
Your IMEI will be activated within 2–3 hours (sometimes up to 1 day). You’ll receive confirmation via email or SMS.
What Happens if You Don’t Register?
If you don’t register within 90 days of arrival, your phone’s IMEI will be blocked from Indonesian networks:
🚫 No calls
🚫 No texts
🚫 No mobile data
✅ You can still use Wi-Fi (e.g., WhatsApp, Telegram)
Tips & Troubleshooting
- Check IMEI accuracy: Dial *#06# and match the number with your online registration.
- Delayed activation?: Check your email for updates or contact Bea Cukai support.
- Already blocked?: Contact the Ministry of Industry or your mobile provider for reactivation options.
Bonus: Can You Register After Leaving the Airport?
While registration should be done at the airport, in some cases, you can also visit a local Bea Cukai (Customs) office within 24 hours of arrival. However, it’s easier and faster to do it on arrival.
Final Checklist Before You Travel
✅ Check your IMEI with *#06#
✅ Bring your device invoice
✅ Know your device value (USD)
✅ Have passport + boarding pass ready
✅ Register within 24 hours after arrival if staying long-term
Conclusion: IMEI Registration Made Easy
Registering your IMEI in Indonesia ensures your phone works smoothly with local SIM cards — and keeps you compliant with government regulations. Whether you’re a digital nomad, expat, or long-term visitor, take a few minutes to register on arrival, and avoid the headache of a blocked device later.